

Projects :: Mountain Bike Mobile
Radio and bikes have never easily worked together. Cycling apparel and cycle add-ons lack any kind of loop points to attach a hand-held radio. If you can stuff your radio in a pocket, chances are you cannot access it whilst moving, and the aerial will be at the wrong polarisation; and probably poking you in the nose! This was the problem I was facing, and this is my solution.
I decided to investigate the  Klick Fast
system as used by the UK emergency services. The first challenge was to adapt their Motorola (TETRA) radio mounts
to something that could be used with Amateur Radio transceivers. If only they would all standardise...
Klick Fast
system as used by the UK emergency services. The first challenge was to adapt their Motorola (TETRA) radio mounts
to something that could be used with Amateur Radio transceivers. If only they would all standardise...
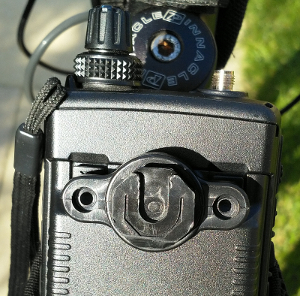
The Yaesu FT2D uses two sturdy stainless screws to attach its belt-clip (to the battery), and that allowed me to drill a couple of small holes and securely attach the Klick Fast radio mount to the battery. A separate experiment with a Baofeng GT3 required the construction of a small aluminium converter plate (not shown here). Here is a photo of the slightly modified Klick Fast Motorola TETRA mount attached to my FT2D:
I also added a screw-together jacket mount through part of the pocket on my flossy cycling jacket to hold the radio:
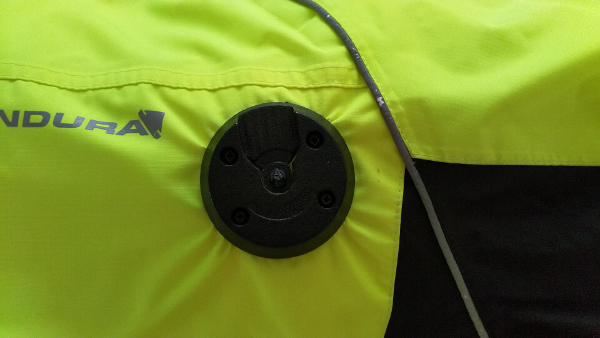
This helps hold the radio in a suitable position for those times of the year where you need a jacket (most months in the UK!). It also has the effect of making people look twice to ensure you are not the Police! The downsides with this solution are: (i) the weight pulling down on the left side of the jacket; (ii) you cannot see the display and do not know which band people called via unless they state they are on VHF or UHF; (iii) the jacket mount is covered when wearing a ruck-sack for shopping. The solution to (iii) was to fit the webbing-style Klick Fast mount to the straps of the ruck-sack and attach the radio to the strap (not pictured). The solution to (ii) may involve a cricket bat!
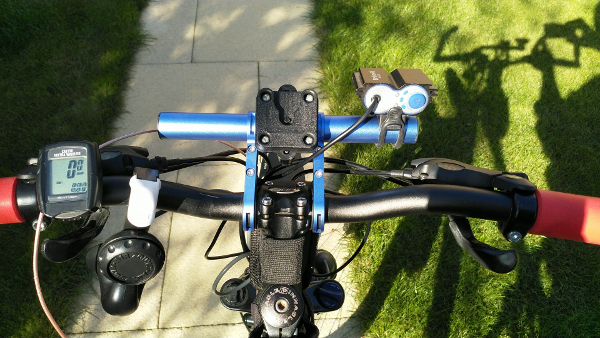
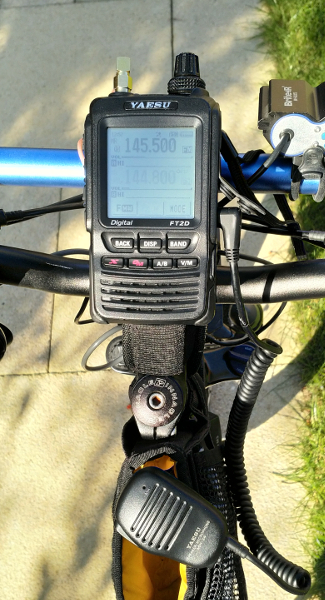
What about those times of year when it is nice enough to ride in a T-shirt? The solution to that was to install a handlebar mount to the bike. This picture details a handlebar extender to lift the radio and front light away from the busy and angled handlebars (the RG316 will be explained later):
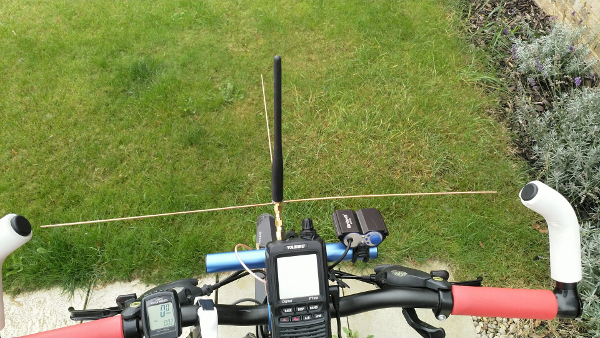
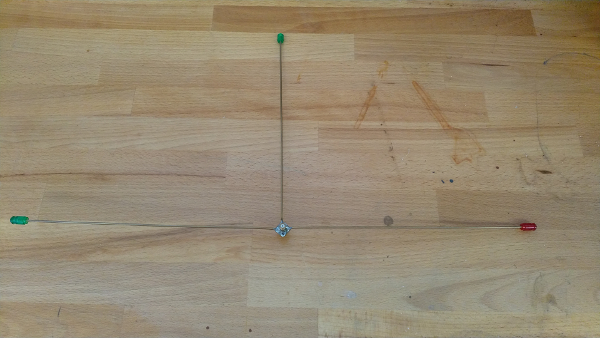
We can now view the screen to see which band people called via, and/or run APRS to beacon our location. Except for one major obvious problem: the rubber-duck aerial is now at 40 degrees from the horizontal and picks-up little. A new solution was needed for the aerial. The well-known tat-bazaar came to the rescue: 135 degree SMA male to female adapters from China. A proof-of-concept of moving the aerial and adding a replacement ground plane was required. This was duly created by stripping down some 2.5 millimetre-squared twin-and-earth mains wiring. Three pieces of the thicker wire were spun straight with a drill (and vice) before being bent at one end and soldered to the body of the SMA adapter. A couple more SMA adapters were needed to space the ground-plane wires away from the radio:
In an earlier test of this system, the light was in the middle with the radio to the right. The right-most wire annoyingly clanged off the top of the handlebars. Future tests of a new ground-plane adapter (detailed below) required the re-arrange to avoid catching on my gloves as I moved my hands.

With the aerial now vertical and operating over a ground-plane, this proof-of-concept test worked quite well - to a point. I found the APRS beacons needed some help from the QTH station (Yaesu FTM-400XDE plus TinyTrak4 TNC with Xastir) acting as digipeater. There are local digipeaters at Barkway Ridge, Ampthill, and Maddingley; but none of them can hear the APRS packets from the hand-held when cycling around Biggleswade/Southill/Shefford/Henlow/Clifton. At the time of testing, I was using a Comet SMA3 aerial prior to it malfunctioning with an open-circuit. Another issue was the need to duck-under low-flying trees and the proximity of the aerial to one's eyeballs/nose. I asked Aunt Sally for my thinking-head so I could up with a better solution; and make a better ground-plane adapter...
What if ... ?
What if I fitted an SMA bulkhead connector to the retro-fit rear mudguard and installed the aerial behind me? In creating a brand new ground-plane adapter system, I had sourced a couple of female-female SMA bulkhead connectors. The spare was duly installed in the plastic mudguard with four brass M2.5 bolts (thanks to Chris G3XIZ for having a stash of random M2.5 nuts, bolts, and washers).

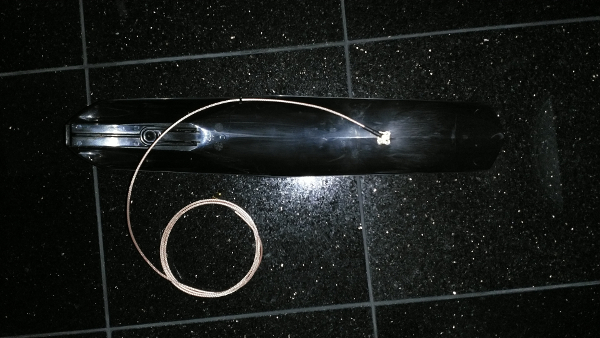
After sourcing suitable RF spares, a coaxial lead was made with RG316 and two right-angled SMA connectors. The lead was long enough to reach from the rear to the front of the bike, with a little extra for the steering. The image below shows the mudguard fitted with one SMA and one weather-proof tie-wrap. Two ties were fitted by carefully cutting-out rectangular holes in the plastic with a suitable knife. This was not the easiest thing to photograph!
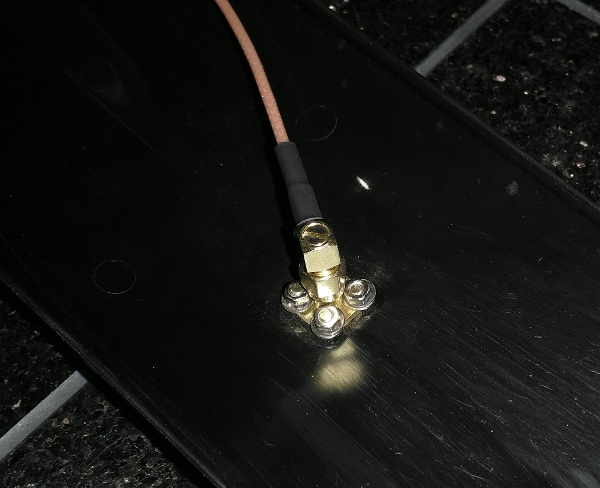
Here is a close-up of the underside with the right-angled SMA attached prior to weather sealing. I must again thank Chris G3XIZ for a few brushes of Liquid Tape to seal the connectors. Whilst I try not to ride in the rain, UK weather can catch you out!
Here is the mudguard fitted back to the bike with the RG316 run along the underside of the frame. Weatherproof tie-wraps secure the coax to the brake cable.
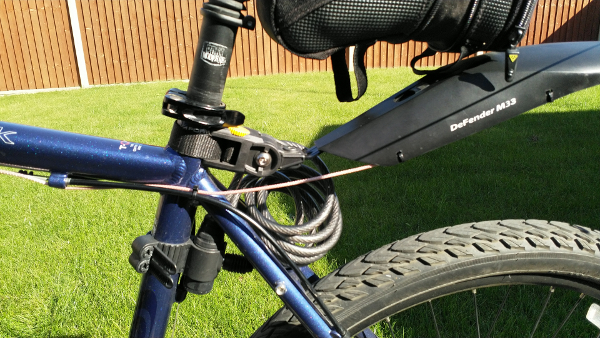
A loose weatherproof tie-wrap helps hold the RG316 as it follows the brake/gear cables. Those with solid hydraulic brake lines could tie the RG316 more securely.

The spare RG316 is loosely looped around the handlebar extender to allow movement when steering. Here it is attached to the radio:
Am I being horrid making you wait until the end to see the aerial system? Here is it:
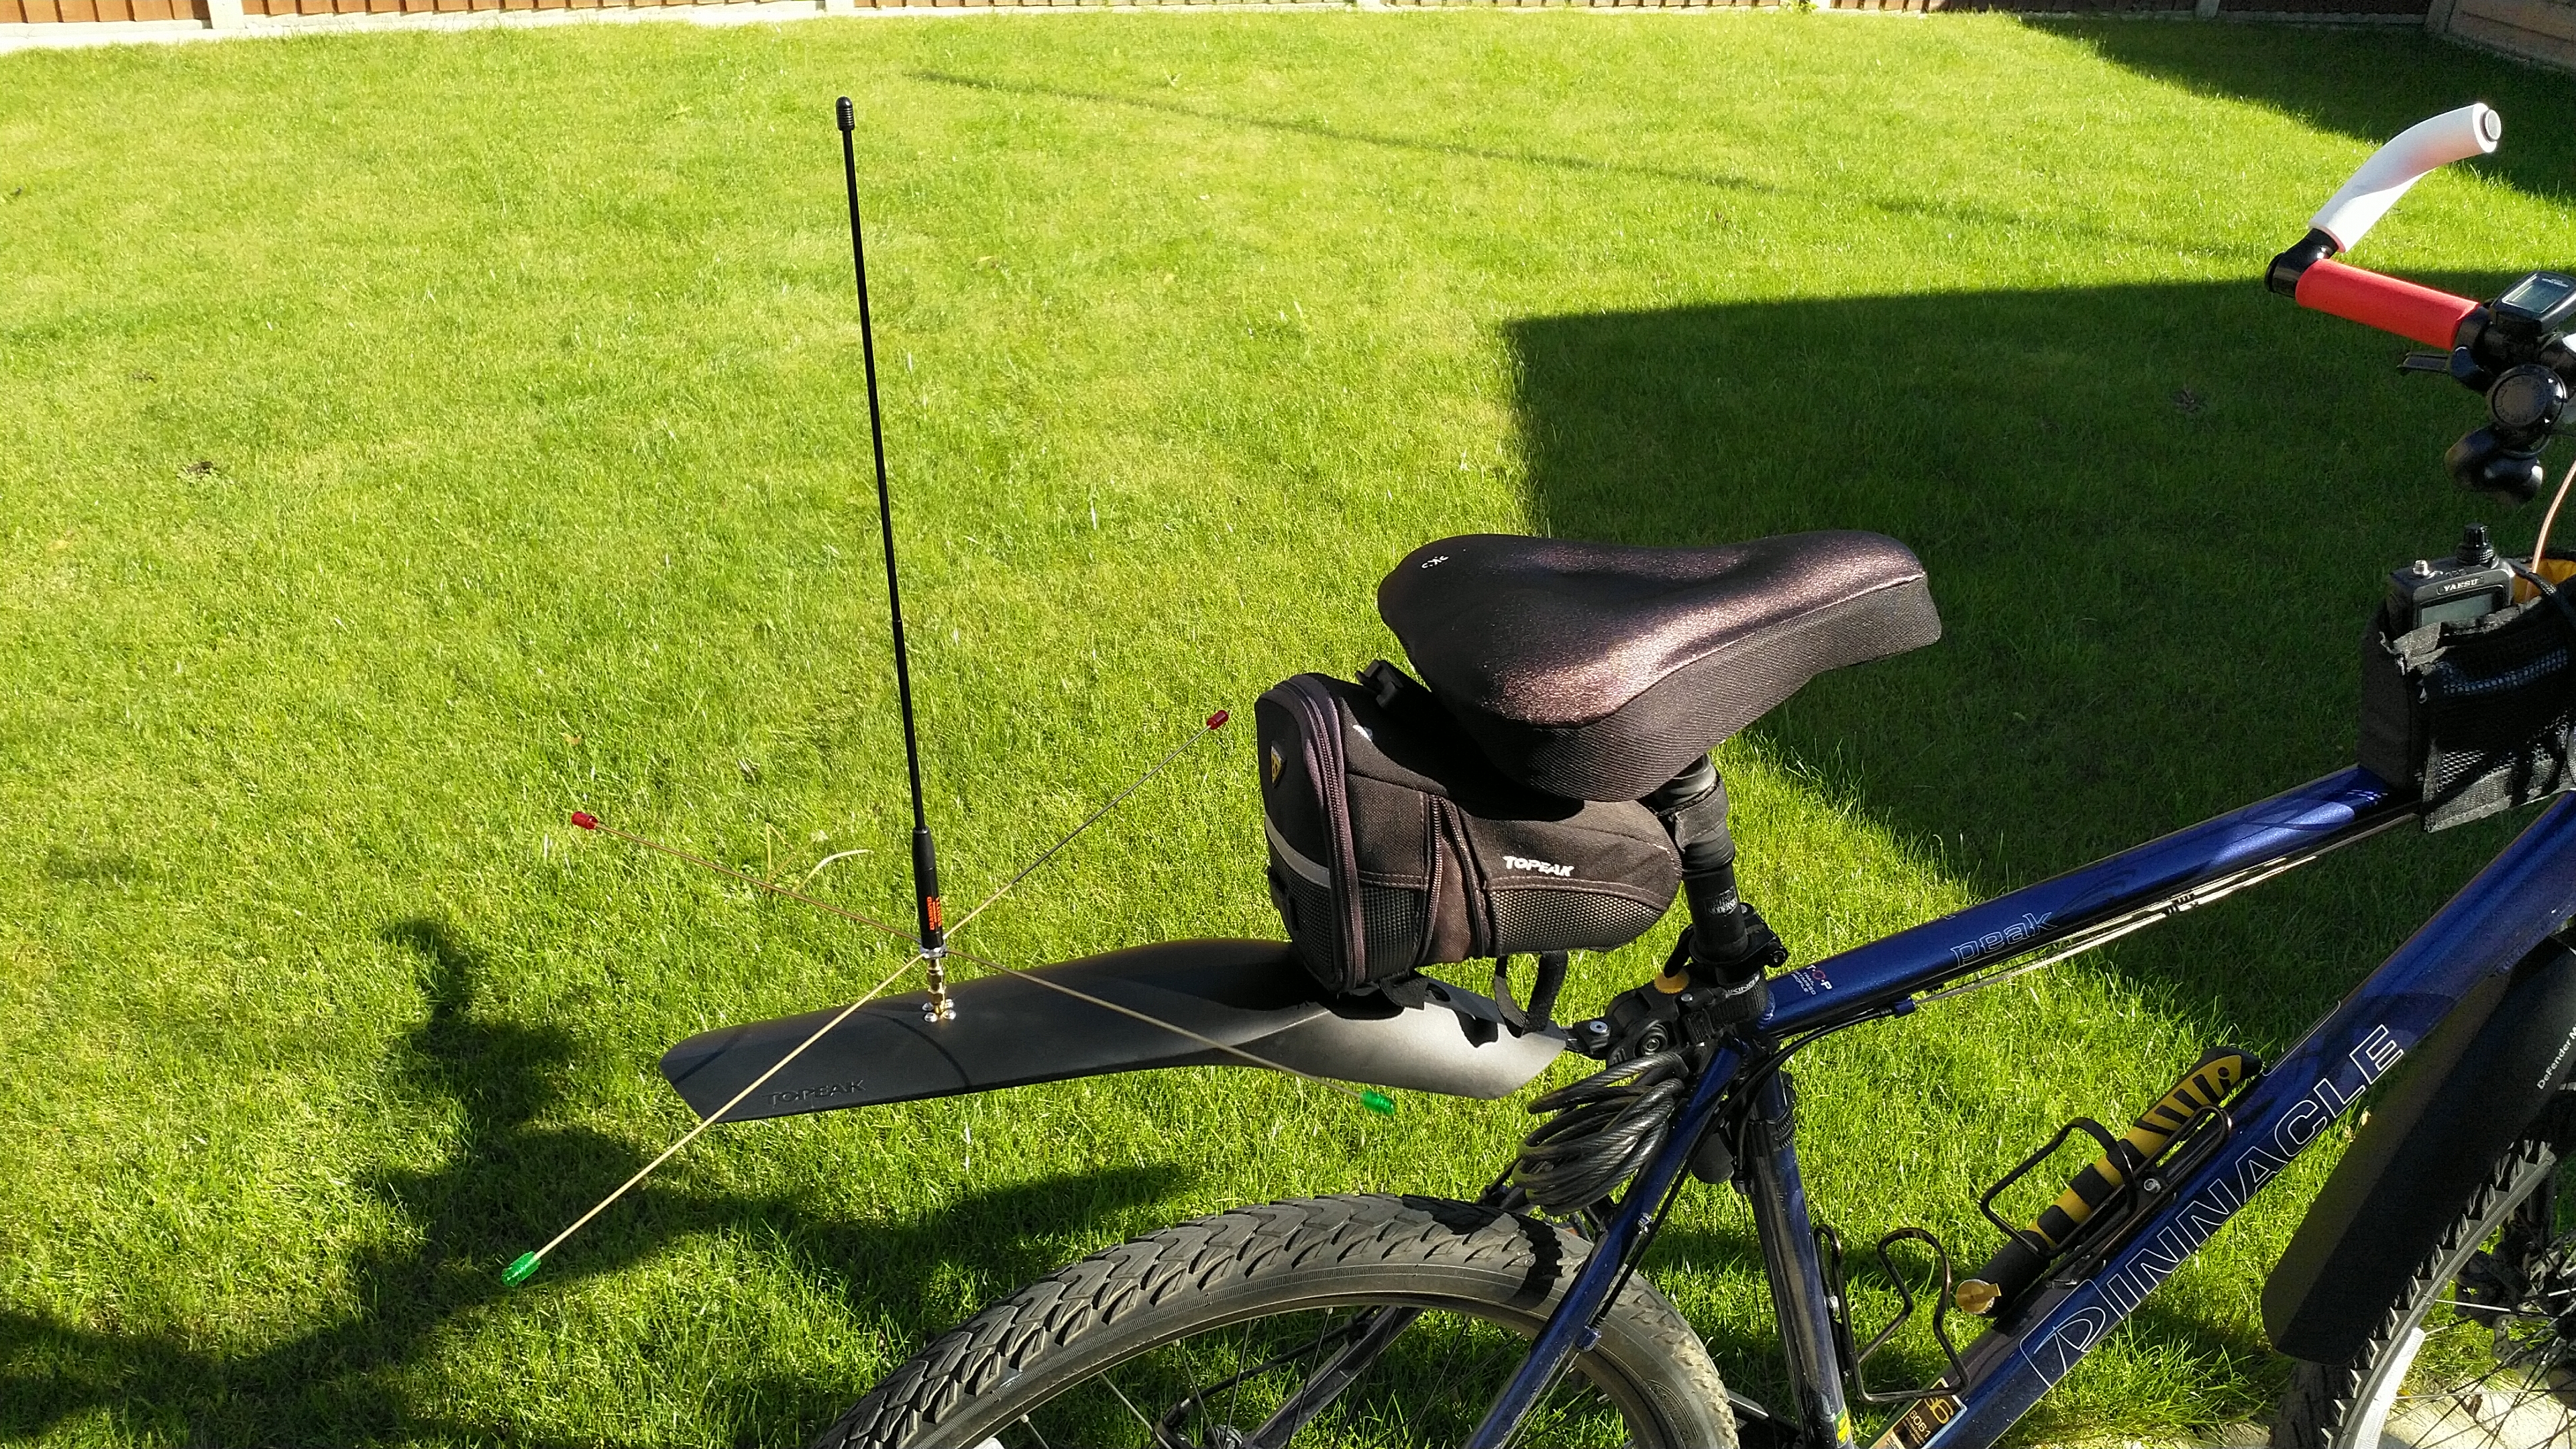
Click on the image to load a larger version (in a new window).
The ground-plane adapter is made from a female-female SMA bulkhead adapter and four 250 millimetre lengths of 2 millimetre thick brass rod. Whilst not exactly quarter-wave (at 2 metres), they are the easiest lengths to source. The rods were placed in a vice by approximately 4 millimetres and bent over to create a stable hook-end for soldering. A spare SMA-male adapter was fitted to the bulkhead prior to gently clamping the assembly in a vice. The brass rod was held in place with a "helping-hands" whilst they were soldered with a 45 Watts soldering iron and proper Lead/Tin solder. You may need to file the underside after soldering to ensure everything is level. Those with a proper metal bending machine may be able to bend the brass rod closer to the end. The outer-ends of the brass rod needed bulking-up in order to facilitate the installation of the stylish Lego parts. Compression covers for brake/gear cables (pictured below) were just the right size. They were cut-down and soldered on, then filed flat to ensure a snug fit with the Lego prior to applying a suitable glue. Florescent polyethylene beads might make suitable end protectors if you can source four and not 100! Be aware you may need to drill larger holes and beads made from resin will crack and break. I tried resin beads first, then switched to Lego!
An SMA male-male coupler is required to connect everything up. The aerial is a Diamond SRH771.

An 8 mm spanner is carried to facilitate fitting/removal in case of leaving the bike unattended for a length of time.
Conclusions
Updated: 15th July 2021 Running Xastir at home as an iGate, I found most of my VHF (144.8 MHz) packets were received. With 144.8 being a congested band, I started testing on 433.8 MHz. As no-one else in the area is using UHF for APRS, I effectively had my own private channel. The gain of the aerial at home and on the bike is also improved on UHF. I set the FT2D to broadcast packets every 60 seconds, and most are received with ease. There are some shadow zones, which is to be expected of an aerial 1.2 metres off the ground. And being on UHF means I am not annoying other APRS users on VHF!
I found it necessary to fit two pieces of aluminium strips to provide extra support to the mudguard. These are riveted to the plastic and use existing bolt holes on the rear frame (for naff rim brakes). The improvements can be seen at the bottom of this page.
Broke it!
Unfortunately, repeated knocks from my left leg getting on and off the bike broke one of the radials off, and despite back-tracking, I never found it. So it was time to make a version 2!
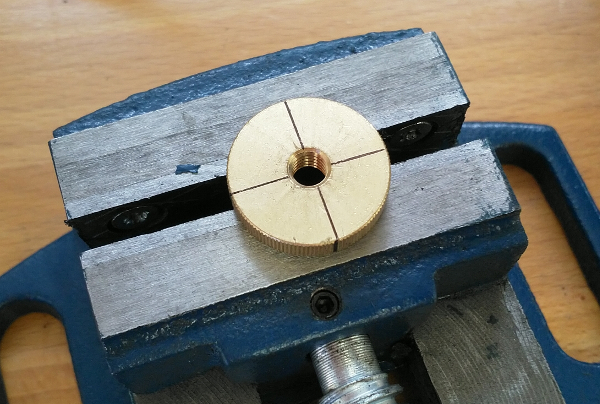
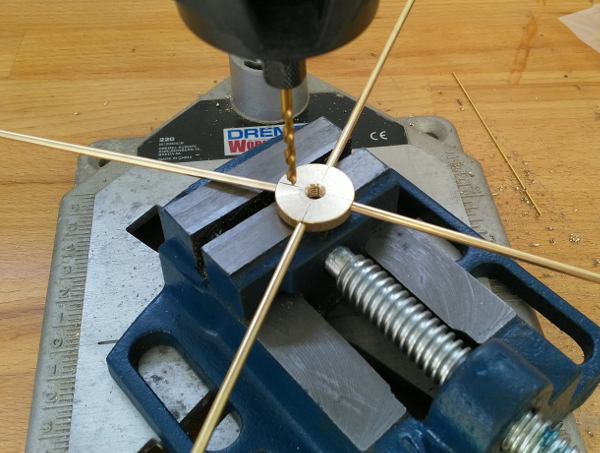
I thought I would use thicker brass rod this time around, but that would need something meatier in the middle. I found a: "Brass Knurled Thumb Nut Thin Type Grip Knob DIN 467" on a well known tat-bazaar. The thick version has a longer threading area, so I opted for an M6 thin version. The diameter seemed about right. The rod is 3mm and there is a new SMA bulkhead connector.
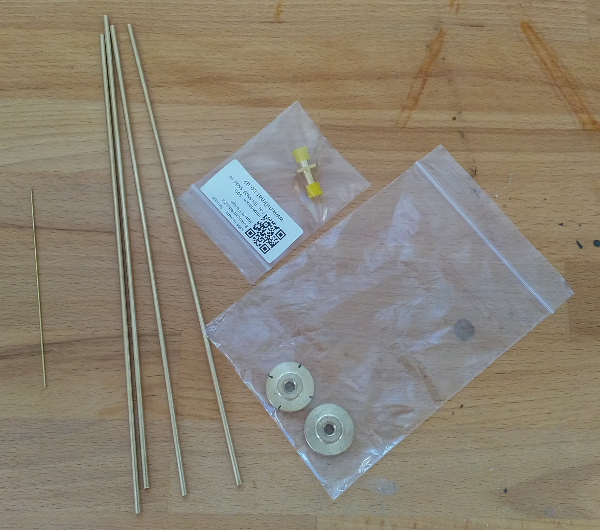
The 1 mm brass rod was an idea to try and braze the parts together. It did not work! I had also hoped to cut an M3 thread on the ends of the rods to facilitate screwing them in place. Unfortunately, that plan failed as well. I really needed a lathe to take off a small amount to allow the die cutter to work correctly. The black marks on one of the wheels are made with the aid of the markings on a circle template.
Despite trying to be super accurate with the Dremel drill press, things still went a little wonky. The edge-on holes for the radials ended up with a slight slant on them resulting in all of the radials pointing slightly down. I clearly need a proper pillar drill and bolts to clamp the vice down.
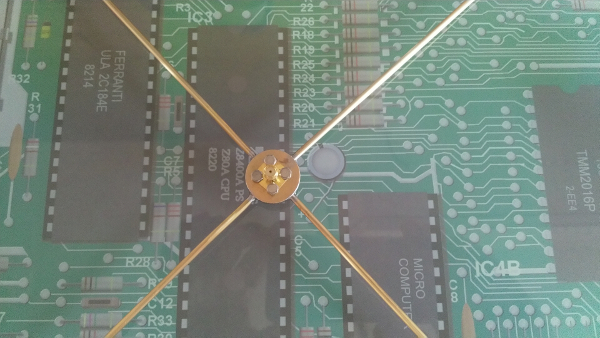
With brazing out of the question, I had to return to using Lead/Tin solder. With the radial arms inserted around 8 mm into the brass, I hope this is a more resilient design. My drilling was also a little off when trying to drill the holes for the SMA - another need for an accurate pillar drill! This is the finished unit with the SMA bolted into place with four M2.5 stainless steel bolts.
Underside using M2.5 nylock stainless steel nuts.
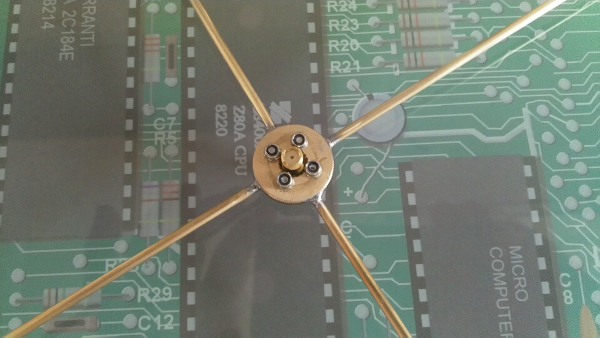
Thankfully the SMA adapter still fits! Ideally, with a decent drill rig, I would have drilled more precise holes and tapped them with an M2.5 tap.

Here is the finished version 2 with new Lego decoration. The Lego makes it stand out, and saves me from stabbing my leg! Plus, it's cool!!
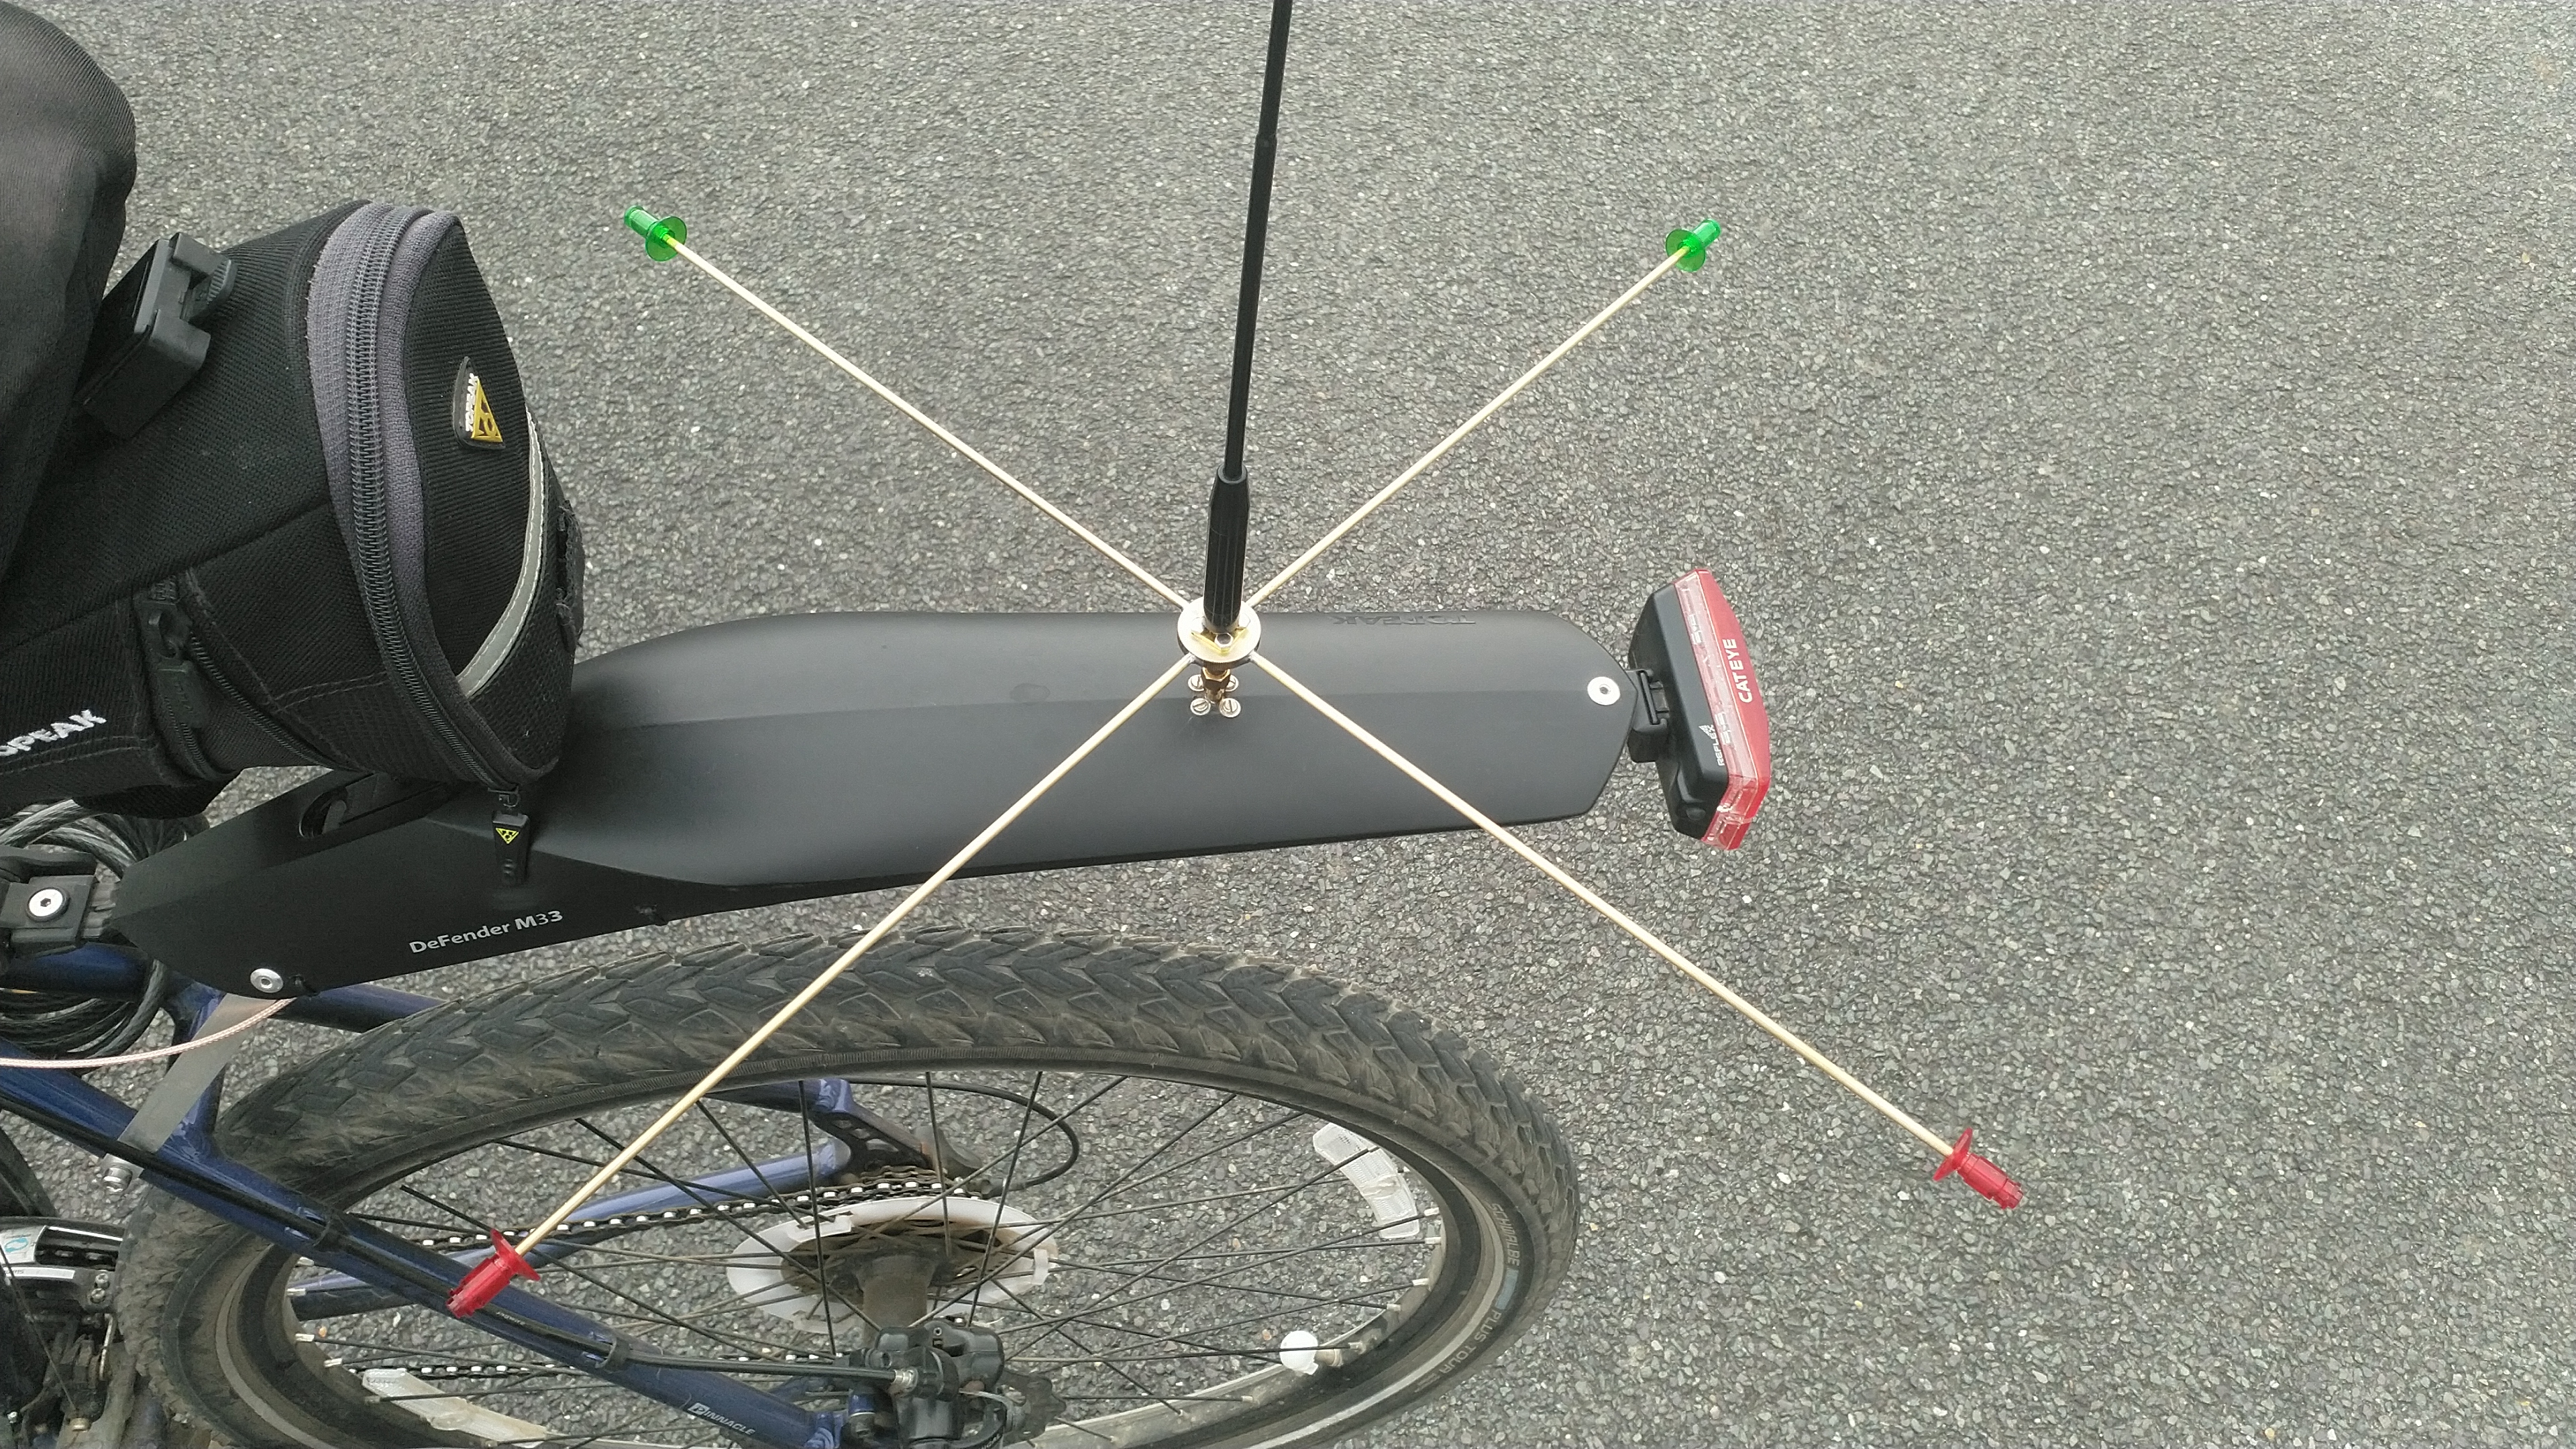
Click on the image to load a larger version (in a new window).
It is the 15th of July 2021 at the time of writing-up this version 2. Let's see how long it lasts...
Page updated: 15th July 2021
Home
|
Tips
|
Awards
|
Linux
|
fldigi
|
APRS
|
QSSTV
|
WSJT-X
|
Projects
|
PSU
|
Repairs
|
Downloads
|
Links
SSTV Gallery
|
eQSL Gallery
|
MQ0PLT eQSL Gallery
|
MQ0PLT eQSL Awards