APRS | Linux | FT-991(A)
Intro
Many people have complained that the FT-991(A) lacks APRS support. I am in agreement that APRS support would have been
a nice little feature. I am aware of 'soundmodem', a Linux utility which provides AX25 modulation, although I have yet to
try it. In my experience, all of the APRS software assumes RS-232 input/output to a TNC. You can add a TNC in the shape of the TinyTrak4 from
 Byonics.
Permissions
You will need to add your user ID to the dialout group in order to access /dev/ttyS* and /dev/ttyUSB* devices.
You can achieve this via the command line. Open a terminal window and enter the following:
sudo usermod -a -G dialout $USER
Where $USER is the username you use to login to your Linux PC. The super-user-do command assumes you have that set-up correctly. Run the command sudo su- and enter the root password if you need to escalate your priveleges to enter the previous command correctly. On CentOS/RHEL/Rocky/Fedora Linux systems, you can use the above command to add yourself to the wheel group, then modify /etc/sudoers to allow the wheel group to sudo with no password.
You may need to restart your Linux PC to ensure the group changes are picked-up by the applications you are trying to run.
Here's one I made earlier!
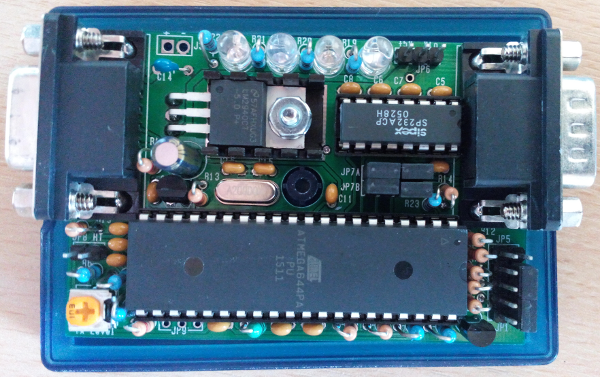
I purchased the TinyTrak4 kit to have a play with APRS at home. I already have it mobile thanks to the FTM-400XDE in my car. I change the supplied LEDs for water-clear versions from my spares. Here is my TT4:
After experimenting with a Baofeng GT3 via the HTK2P cable, I wondered if I could interface the TinyTrak4 to the FT-991(A).
You can with the  M12C/M12P cable.
However, you can make your own cable that takes power from the FT-991(A) to feed the TinyTrak4.
The clues are in the manual, specifically the pin-out of the rear ports - spot the one with power?!

I made my own cable with a standard 9-way D-type, a 6-pin mini-DIN, and a 8-pin mini-DIN.
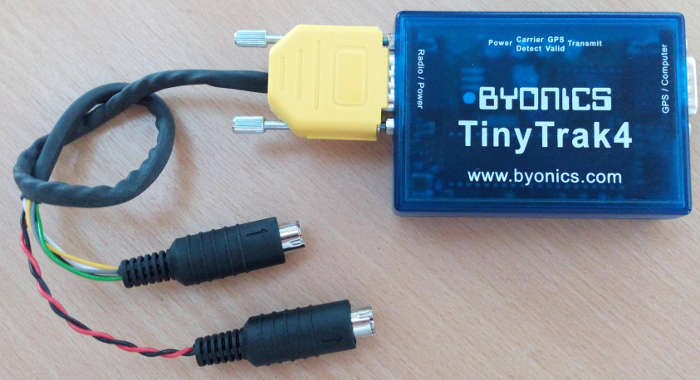
The next steps assume you have configured the TinyTrak4 to operate at 19200bps!
FT-991(A) settings for APRS
In order to use the TinyTrak4 with your FT-991(A), you will need to set the following menu items:
- 062 DATA MODE - PSK
- 076 FM PKT PTT SELECT - DAKY
- 077 FM PKT PORT SELECT - DATA
- 078 FM PKT TX GAIN - 50
- 079 FM PKT MODE - 1200
Set a frequency of 144.800MHz and the mode of DATA-FM. A low squelch setting is also useful; and you do not need the
volume up for the TinyTrak to work. You may want to keep your transmit power low, especially if you are in range of high
 AMSL
APRS repeaters.
Software
I prefer to use Linux, and the guide below is a quick over-view to set-up Xastir on Fedora. I (used to) run Fedora inside VirtualBox as a virtual-machine to save messing around with my main desktop. I assume you already have Fedora installed in VirtualBox, so I will not detail how to set it up here.
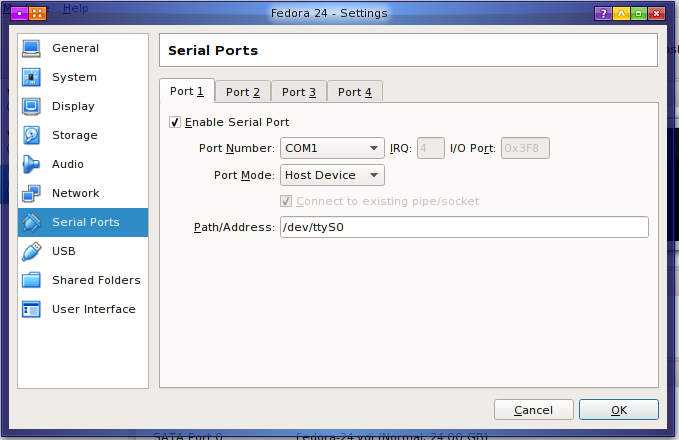
One important tip is to allow your virtual machine access to the serial port(s) on the host computer. The screen-shot below shows the box to tick.
Inside your Fedora VM, open a terminal-window and run the command sudo dnf install xastir. dnf is the replacement for yum, although yum commands work via redirection.
Update: 24th December 2020 VirtualBox 6.x appears to contain a seriously buggy serial port emulator which crashes
when presented with a TinyTrak. According to a bug report, it also baulks at other Amateur Radio equipment. With version 5.x
no longer in support, a better solution was required, ideally native support for xastir in CentOS 7. After some experimentation,
I have been able to rebuild the source-RPMS for xastir (and its dependencies) to allow xastir to be installed on CentOS 7. Please see my
 EPEL
page if you wish to try using my very small repository. All packages are digitally signed and tested on my systems,
although I would advise caution. Please do not blame me if your CentOS 7 installation blows-up!
The shortcut to start Xastir can be found under the Internet menu (in MATE Desktop).
The first step is to configure your station's location, callsign, transmitter power, aerial height, aerial gain, station symbol, and a comment.
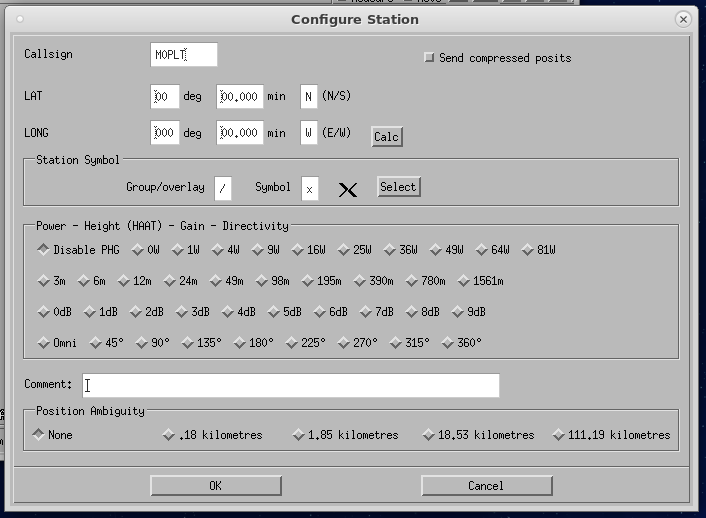
As you are likely to be operating from your home QTH, you can select the little house + aerial symbol.

The default mapping is very basic.
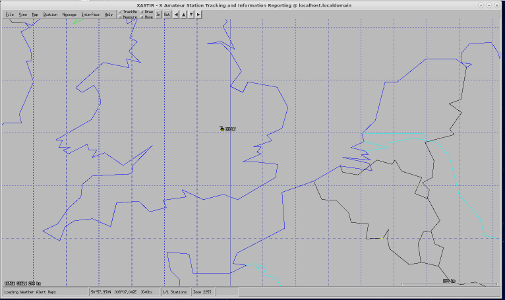
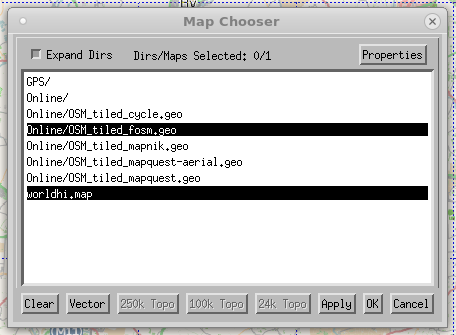
Click on Map > Map Chooser. Select a suitable map overlay. These are downloaded from the Internet, so they can take a while to appear.
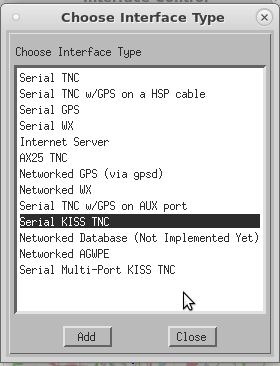
Click on Interface > Interface Control.

Select Serial KISS TNC and Add.
Configure the TNC interface to suit your requirements. Notice the device is /dev/ttyS0 as per the VirtualBox settings above. The speed is set to 19200bps as I set this on my TinyTrak4. It is your choice if you wish to be an iGate. If you have APRS digipeaters around you, there is no need to add to your Internet bandwidth! As I have powerful repeaters within 20km, I set WIDE1-1 to be kind. I suggest reading up on the APRS specifications to fully understand these settings. The specifications were designed for the wide-open spaces in the USA, and not the cramped over-populated UK!

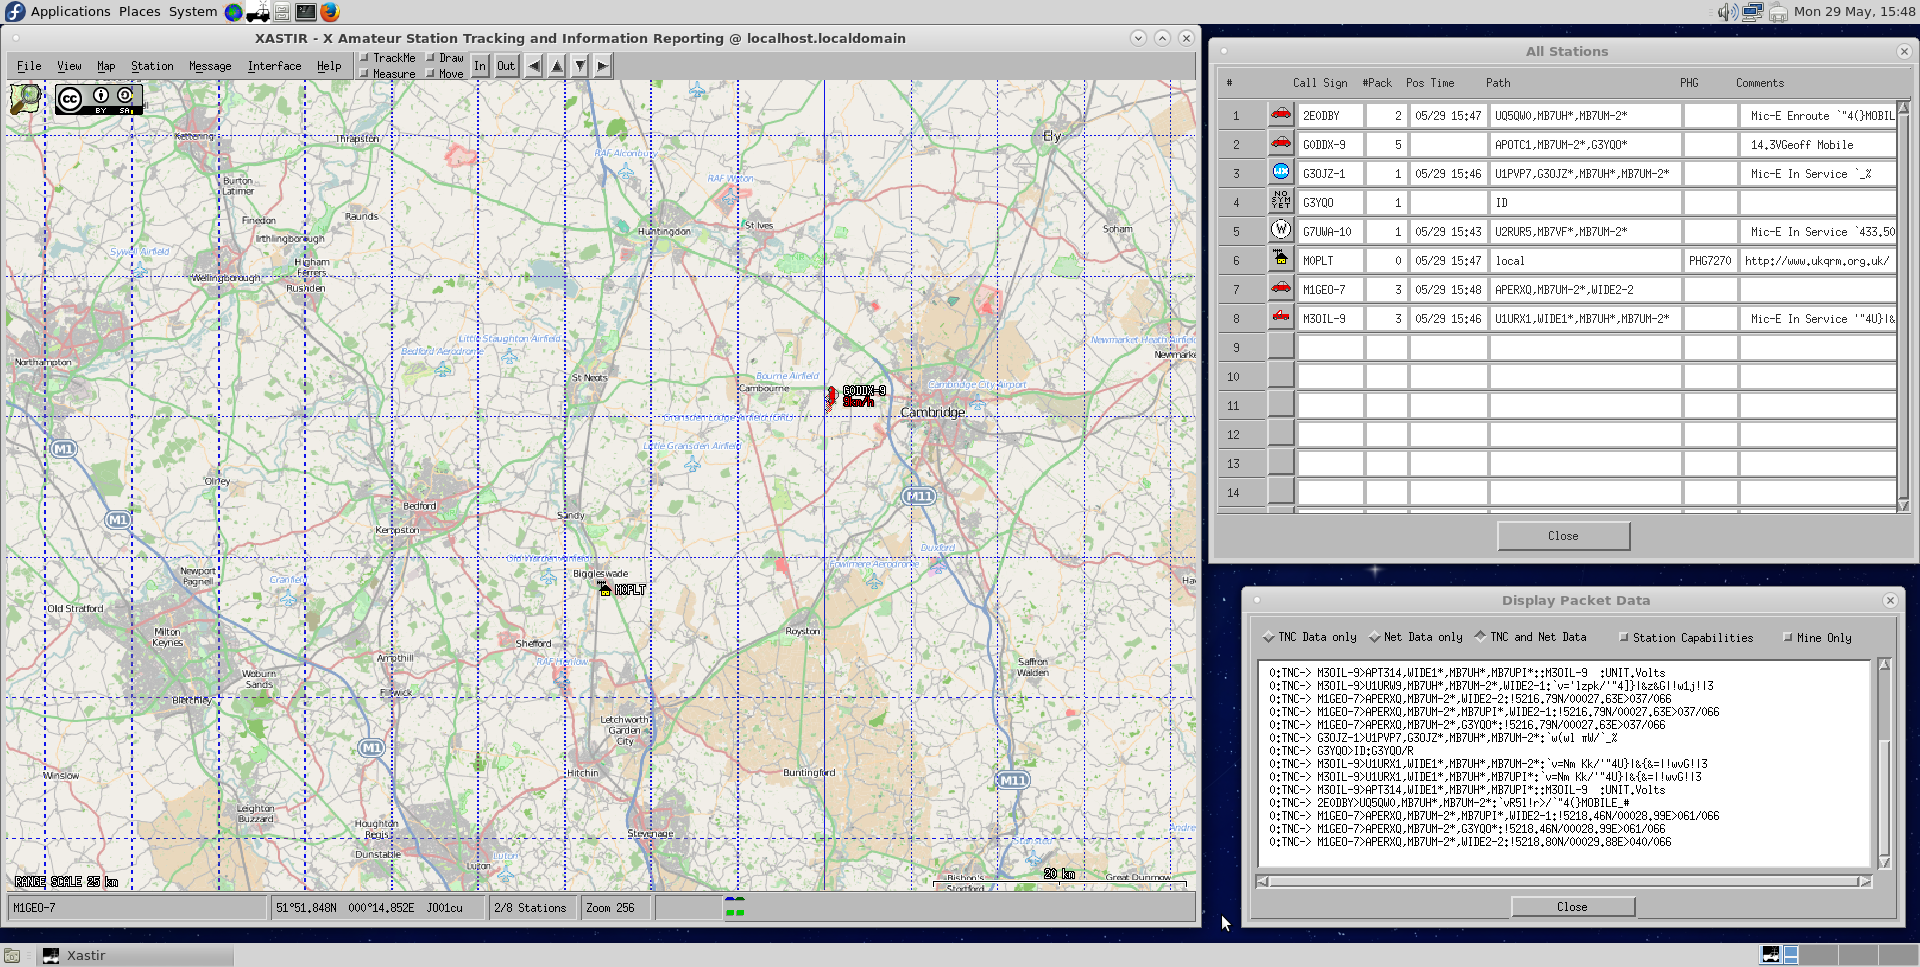
If everything is working correctly, you should start to receive APRS packets from other stations, and they may appear on the map if they are nearby. Click the image below for a larger version.
Please note: The TinyTrak4 may operate on its own answering packets without you operating Xastir. I recommend disconnecting the TT4 when not in use and/or when you are operating on other bands. The TT4 does not know it should not blast 7MHz with AFSK data!
I recommend reading the  Xastir Wiki to obtain the best of the software.
Enjoy!
Update: FTM-400
Yaesu have done it again! The brilliant FTM-400XDE (I have two) will output APRS data via its USB port (via SCU-20 programming cable). Sadly, it is not in TNC2 format, so it is not usable by Xastir; and you cannot access the TNC modem function via USB either. That is a massive shame for a very capable radio!
The TinyTrak 4 can come to the rescue. Using Yaesu's CT-164 cable, you can interface the TT4 to the FTM-400. If you have copied the top part of this guide to interface to the FT-991(A), it is as simple as plugging in the interface cable. You will also need to create your own power cable for the TinyTrak. In order to avoid the need to remove the 8-pin mini-DIN that takes power from the FT-991(A) TUN/LIN port, I sourced an 8-pin mini-DIN free-socket and soldered wires for +VE and 0V to connect to my power-supply system. Copy the pin-out for the FT-991(A) TUN/LIN socket; and make sure you get the polarity correct to avoid blowing-up your TT4!
You can use the APRS modem within the FTM-400 to transmit main station details and to see other people's packets. The TinyTrak4, interfaced to Xastir, will also show all of the APRS traffic it sees via the AFSK port on the rear of the radio. You can configure Xastir to operate through the TT4 and the FTM-400 to effectively operate two APRS functions. To avoid annoying people, I have set my FTM-400 to a one-hour beacon, and Xastir to beacon when it feels like it (usually an hour). If you set to digipeat, you will also see Xastir repeating other station's packets. With the addition of an Internet connection, you can also become an iGate.
Crossband repeater: The FTM-400 can act as a cross-band repeater. Curiosity and a licence to experiment led me to this test. With the APRS modem disabled, and the TT4 powered down, it is possible to establish a cross-band AFSK repeater function between 144.8 MHz and 433.8 MHz. Hand-held radios set to operate APRS on 433.8 MHz will have their traffic repeated to 144.8 MHz, and iGate/repeater and other station traffic will also repeat from 144.8 MHz to 433.8 MHz. This was idle curiosity and probably does not have a real-world application. Most hand-held radios with APRS tend to be dual-band. The limitation to APRS on a hand-held is the aerial and how close you may be operating (riding a Mountain Bike, for example) to iGate/repeater systems.
Page updated: 3rd July 2022
Home
|
Tips
|
Awards
|
Linux
|
fldigi
|
APRS
|
QSSTV
|
WSJT-X
|
Projects
|
PSU
|
Repairs
|
Downloads
|
Links
SSTV Gallery
|
eQSL Gallery
|
MQ0PLT eQSL Gallery
|
MQ0PLT eQSL Awards


